processed_1500__MG_9561-Edit.jpg

Blog

My journey to connect with purpose and passion.

Posts in Tutorials
Kicking some Fresh Rag Artist Butts!

I was super excited to appear on Fresh Rag again. This time, Dave and I pull no punches as we discuss conversion and goals. I see red when I meet artists who are working so hard at their craft and websites only to find out they are pouring their hard earned efforts and money down the toilet. 

I get that Google Analytics is a bit of a scary beast. And setting up goals and tracking conversions is a bit of a mind boggle to get going. But it is SO SO SO important. If you are selling ANYTHING online, or paying for ANY advertising, I hope you will take a listen to this episode!

http://www.freshrag.com/sean-howard-wants-to-convert-you-to-his-way-of-thinking/

And for anyone looking to understand how to get their heads wrapped around conversions, you can check out Part 1 of my video tutorial on tracking online conversions.

And in Part 2, I walk through how to actually setup a goal in Google Analytics and a trick for tracking newsletter signup conversions in Squarespace.

Finally, I leave you a link to my Medium article on How to Advertise Like a Ninja Online where I walk through the power of conversion and give some additional tips and examples!

I know this can be some heady stuff. I'd love to know what you think! Or any questions you have so I can help to create more content to make this easier for all of us to put into action!

TutorialsSean HowardComment
How to Advertise Like a Ninja

Why a ninja?

Ninjas have purpose. They are focused and ready to act in alignment with said purpose.

Ninjas conserve energy. There is no wasted movement. The same goes for money. A ninja would never be happy pouring money down the hungry monster’s throat that is Google, Facebook and every other online advertising platform disguised as a service.

Ninjas strike with precision. They abhor the hack and slash approach and just “seeing what will happen.” They study their opponent and when they strike, it is with ultimate precision.

Learn the three tips to Advertise like a Ninja Online in my Medium article.

Emulsion Transfers on Live Edge Wood (Step by Step)

A few people have asked me to document the process I use to transfer my photographs to wood, such as in the images below. 

I print on acetate transfer sheets. I then coax the emulsion (and ink) off these sheets and bind it to the wood surface, in essence transferring the printed image to the wood.

This is DRAFT TWO of my process. I would love to know what questions you have that aren't answered so I can continue to improve this resource.

Equipment:

Printer (I use the Epson Pro 3880)
Transfer sheets (I've had good luck with Inkpress Clear Film from B&H or Vistek)
DASS Supersauce (from DASS Art)
Multi-purpose 2 cup measuring cup
91% Isopropyl Alcohol
Live edge wood (I get mine from the amazing ROCA WoodWorks)
Circular saw and sander
100 grit and 220 grit (or similar) sandpaper
Lock bar clamps (or something similar)
High density foam paint roller
1" or 2" unused paint brush
Scotch tape
Small brayer
Sewing needles
Stopwatch (most smart phones will work)
Empty jars
 

The Three Stages

Stage One: Prep
Stage Two: Transfer
Stage Three: Finish

Stage One: Prep

Prepare the DASS Super Sauce Transfer Medium

It's important you follow the instructions on the bottle. This will be your transfer medium. It releases the emulsion from the transfer sheet and helps bind the emulsion to your piece of wood. It takes 4 hours for a new bottle of Super Sauce transfer medium to be ready to use, so be sure to do this ahead of time. 

If you are in Canada, you will not be able to find the 91% isopropry alcohol the bottle calls for. It must be exactly 91%. You can make 91% isopropyl alcohol by mixing 1.5 cups of 99% isopropyl acohol with 1/2 cup of 70% isopropyl alcohol. 

If you cap the DASS super sauce between uses, you should be able to use the same bottle for weeks, if not months.

Print a placement print

I start by printing a placement print on an appropriately sized transfer sheet. This is a bit of the chicken or egg problem. I might start by measuring the width of piece of lumber I want to work with. Or I might start with an image and print it at a couple of sizes to see if I can find a match for it in the wood grain available.

When printing: only one side of the transfer film sheets will accept ink properly. Wet your thumb and forefinger and press one against each side of the sheet. One side is tacky when wet. This is the side you want to print on. 

Remember to flip the image horizontally in the print dialog as you will be placing the image face down, in essence flipping it. Note that this is not our final transfer print. We are using this one to find the right match with the grain and wood available.

I try the placement print on a variety of pieces of wood. I am looking for a match with the grain and the image. A synergy, if you will. I play until I find a place I like and then I mark the wood where I am going to cut it. Sometimes it's necessary to reprint your placement sheet at different sizes until you find the perfect fit.

You will find that this placement sheet gets marred and scratched in this stage. You will be printing it again for the final transfer. So I make note of the size of the print that worked and any particulars about how I want it printed (lighter, flipped, not flipped, etc.)

Cut the wood piece

You can use a table saw or a circular saw. Trim down the piece to match your image.

Don't worry, Mom. I'm not using power tools. This is a hand double! (It's so not a hand double and I am so in trouble now.)

Prep the wood piece

I cut and sand the piece of wood to a smooth finish. I use a small circular sander as they are quite inexpensive and I sand the piece first with 100 grit and then 220 grit. It's important you take your time here. The surface needs to be silky smooth to the touch. Be sure to remove all the striations from the mill saw as shown in the third image below.

Be sure to remove all the dust from the wood piece before proceeding. I often use a cloth and a shop vac for this. I also don't do the woodworking anywhere near where I will be doing the transfer and epoxy resin processes.

Print the final transfer sheet

The placement sheet gets dirty and scratched up. You will want to print a copy of the image on a new transfer sheet and set this aside. IMPORTANT: Allow this to sit and dry for at least 10 minutes to give the ink a chance to set.

Stage Two: Transfer

Prep your work area

Above is my work area. I provide an image below that you can click to enlarge.

From the left, I have a red tray and a rolling brush. I pour DASS Super Sauce straight from the bottle into this tray. I will use this to pre-coat the wood surface. To the right of this tray, I have my DASS Transfer Medium I prepared many weeks ago. I also have scotch tape, some sewing needles, a brayer, DASS SuperSauce, wipes, an exacto blade and my iphone (to act as a timer.)

I also have the piece of wood I will be transferring the image onto secured into place. I use two pieces of cheap pine on each side to hold it in place. I secure each of these boards to the table with a clamp. I also ensure that the board on the left is flush at the top with the board I am transferring to. I just shove paper under it until it is flush.

Prep the piece of wood

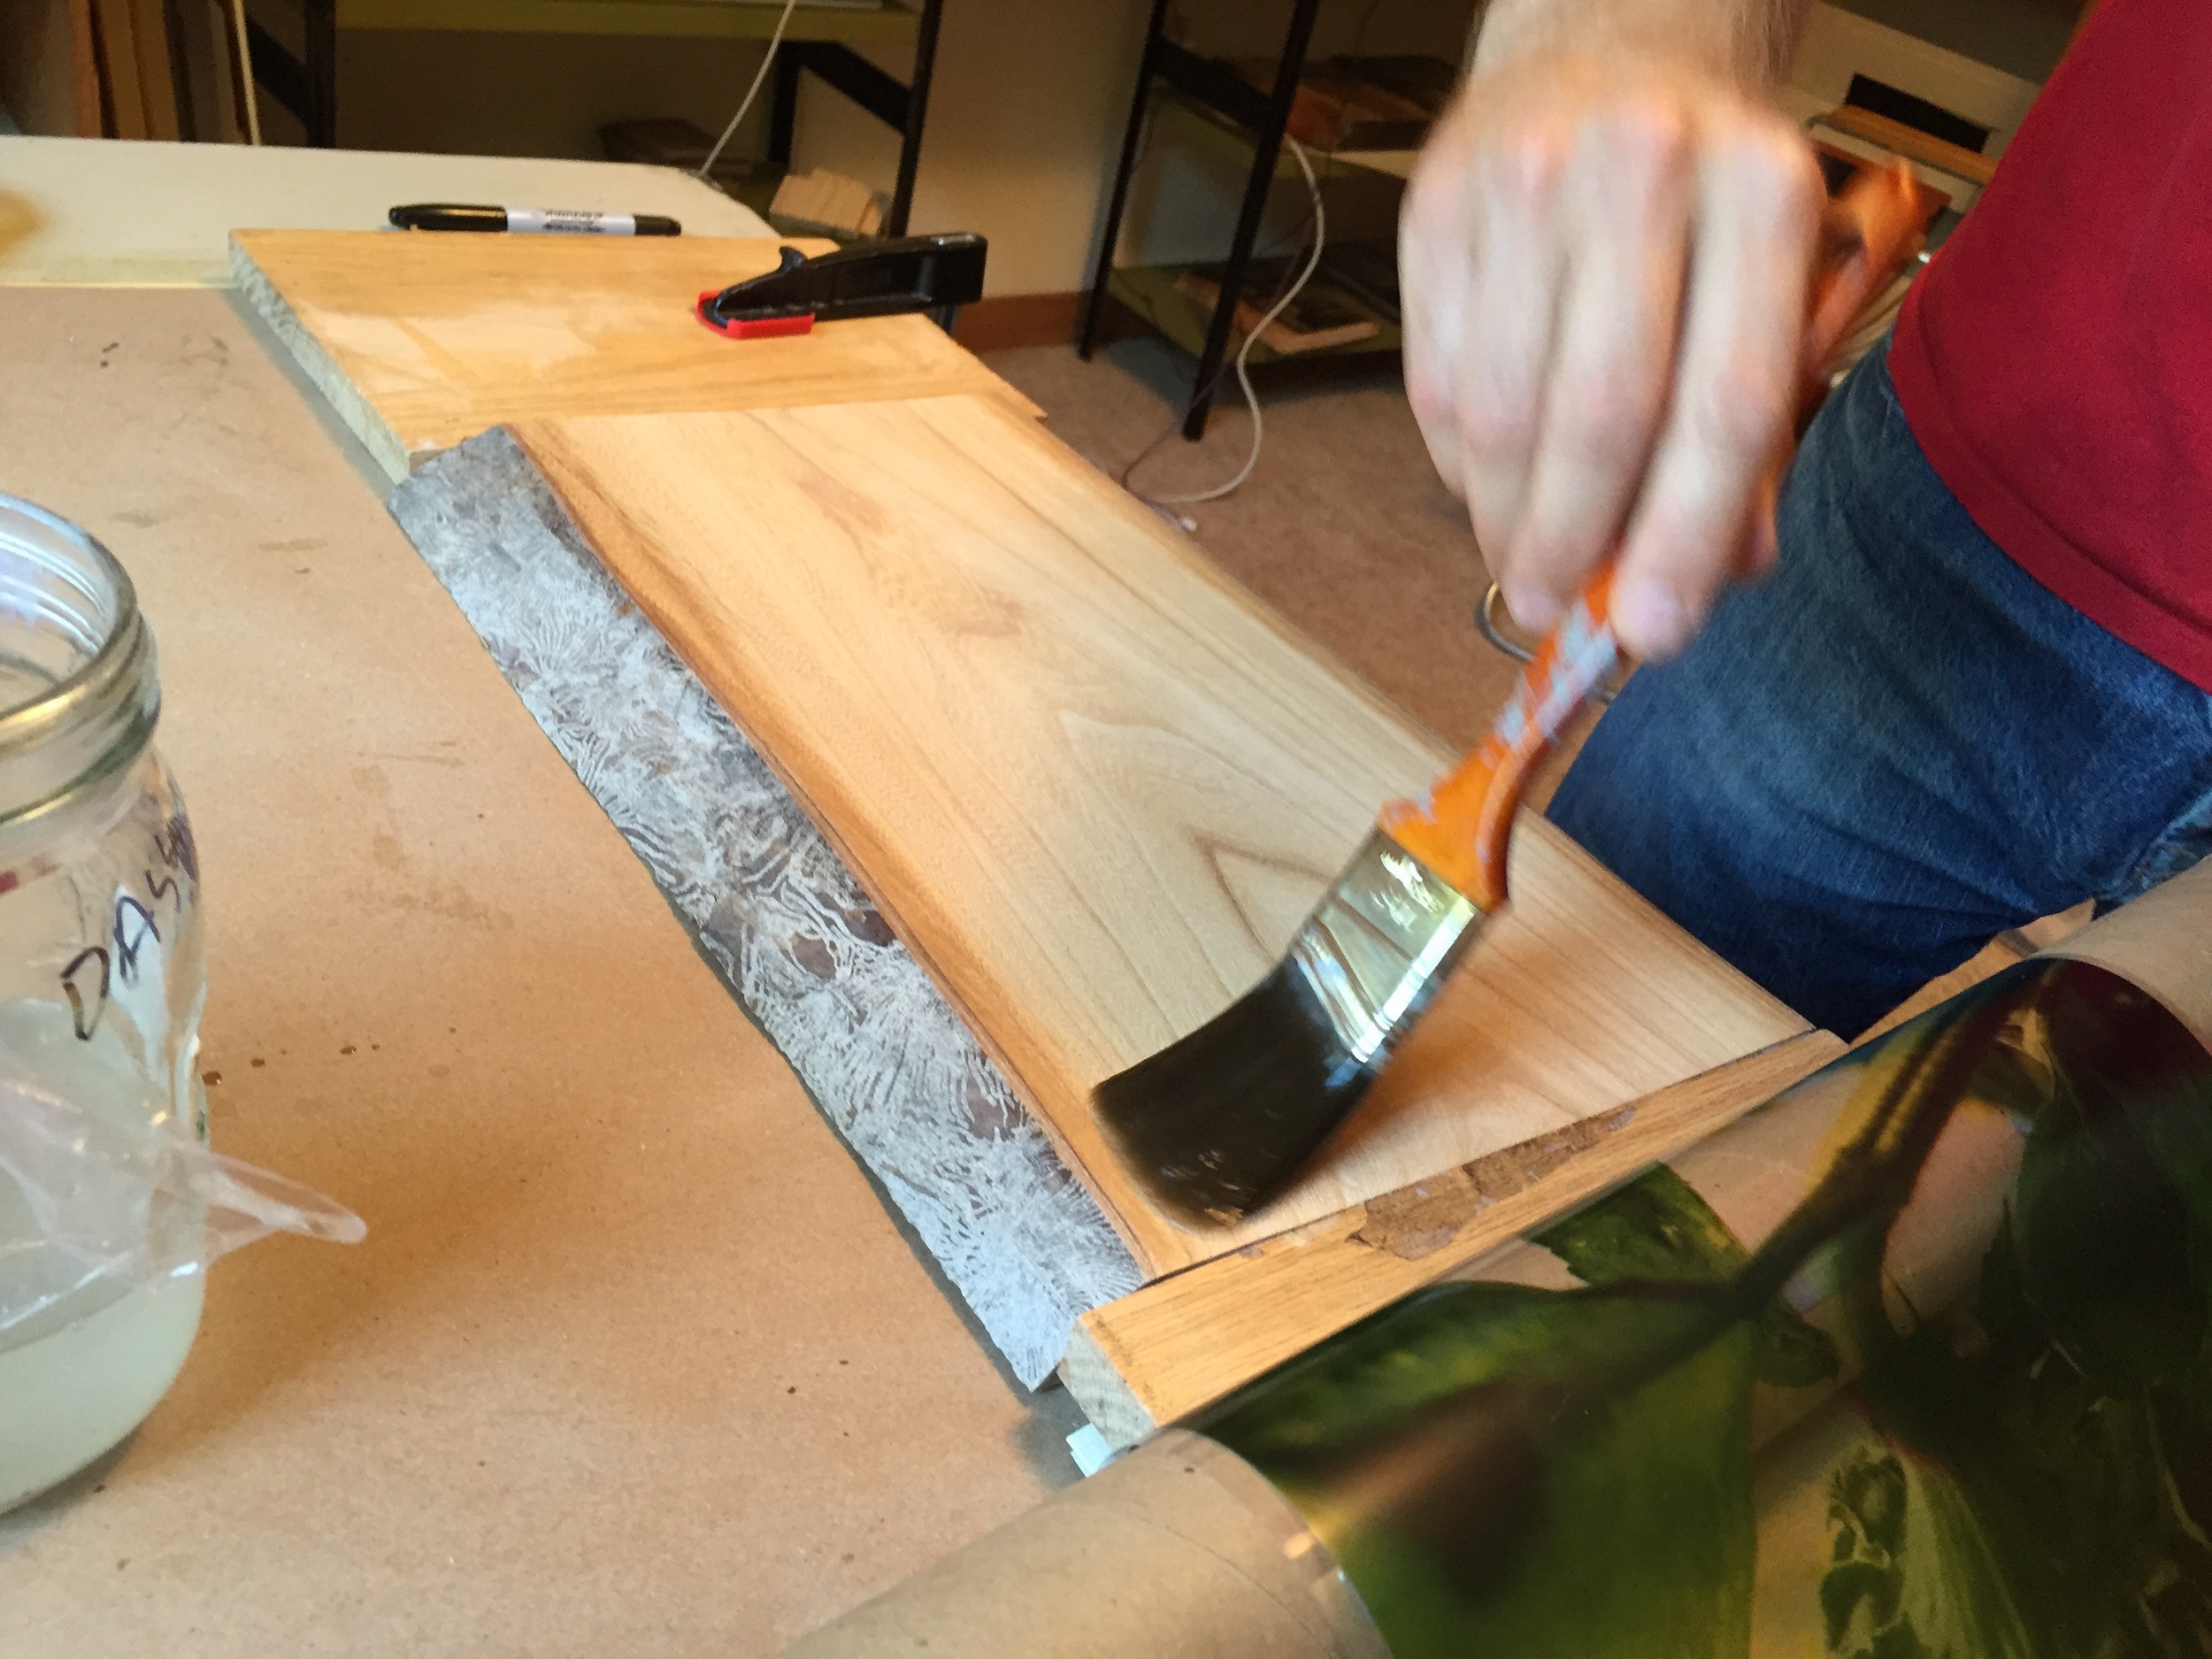
Coat the wood with a light and even coat of DASS Super Sauce. Ensure it has completely dried before proceeding. It is usually fully dry in 3 to 4 minutes. Quick tip: keep a piece of saran wrap over the tray and your DASS should stay good and ready to use in the tray all day.

Place and secure the transfer sheet.

I take the image on the Clear Film and carefully place it onto the wood, with the ink side down. You can determine which side is the ink side by licking thumb and forefinger and pressing both sides of the sheet. The tacky side is the ink side. This goes face down.

BE CAREFUL adjusting the sheet. It is very easy to scratch your transfer sheet.

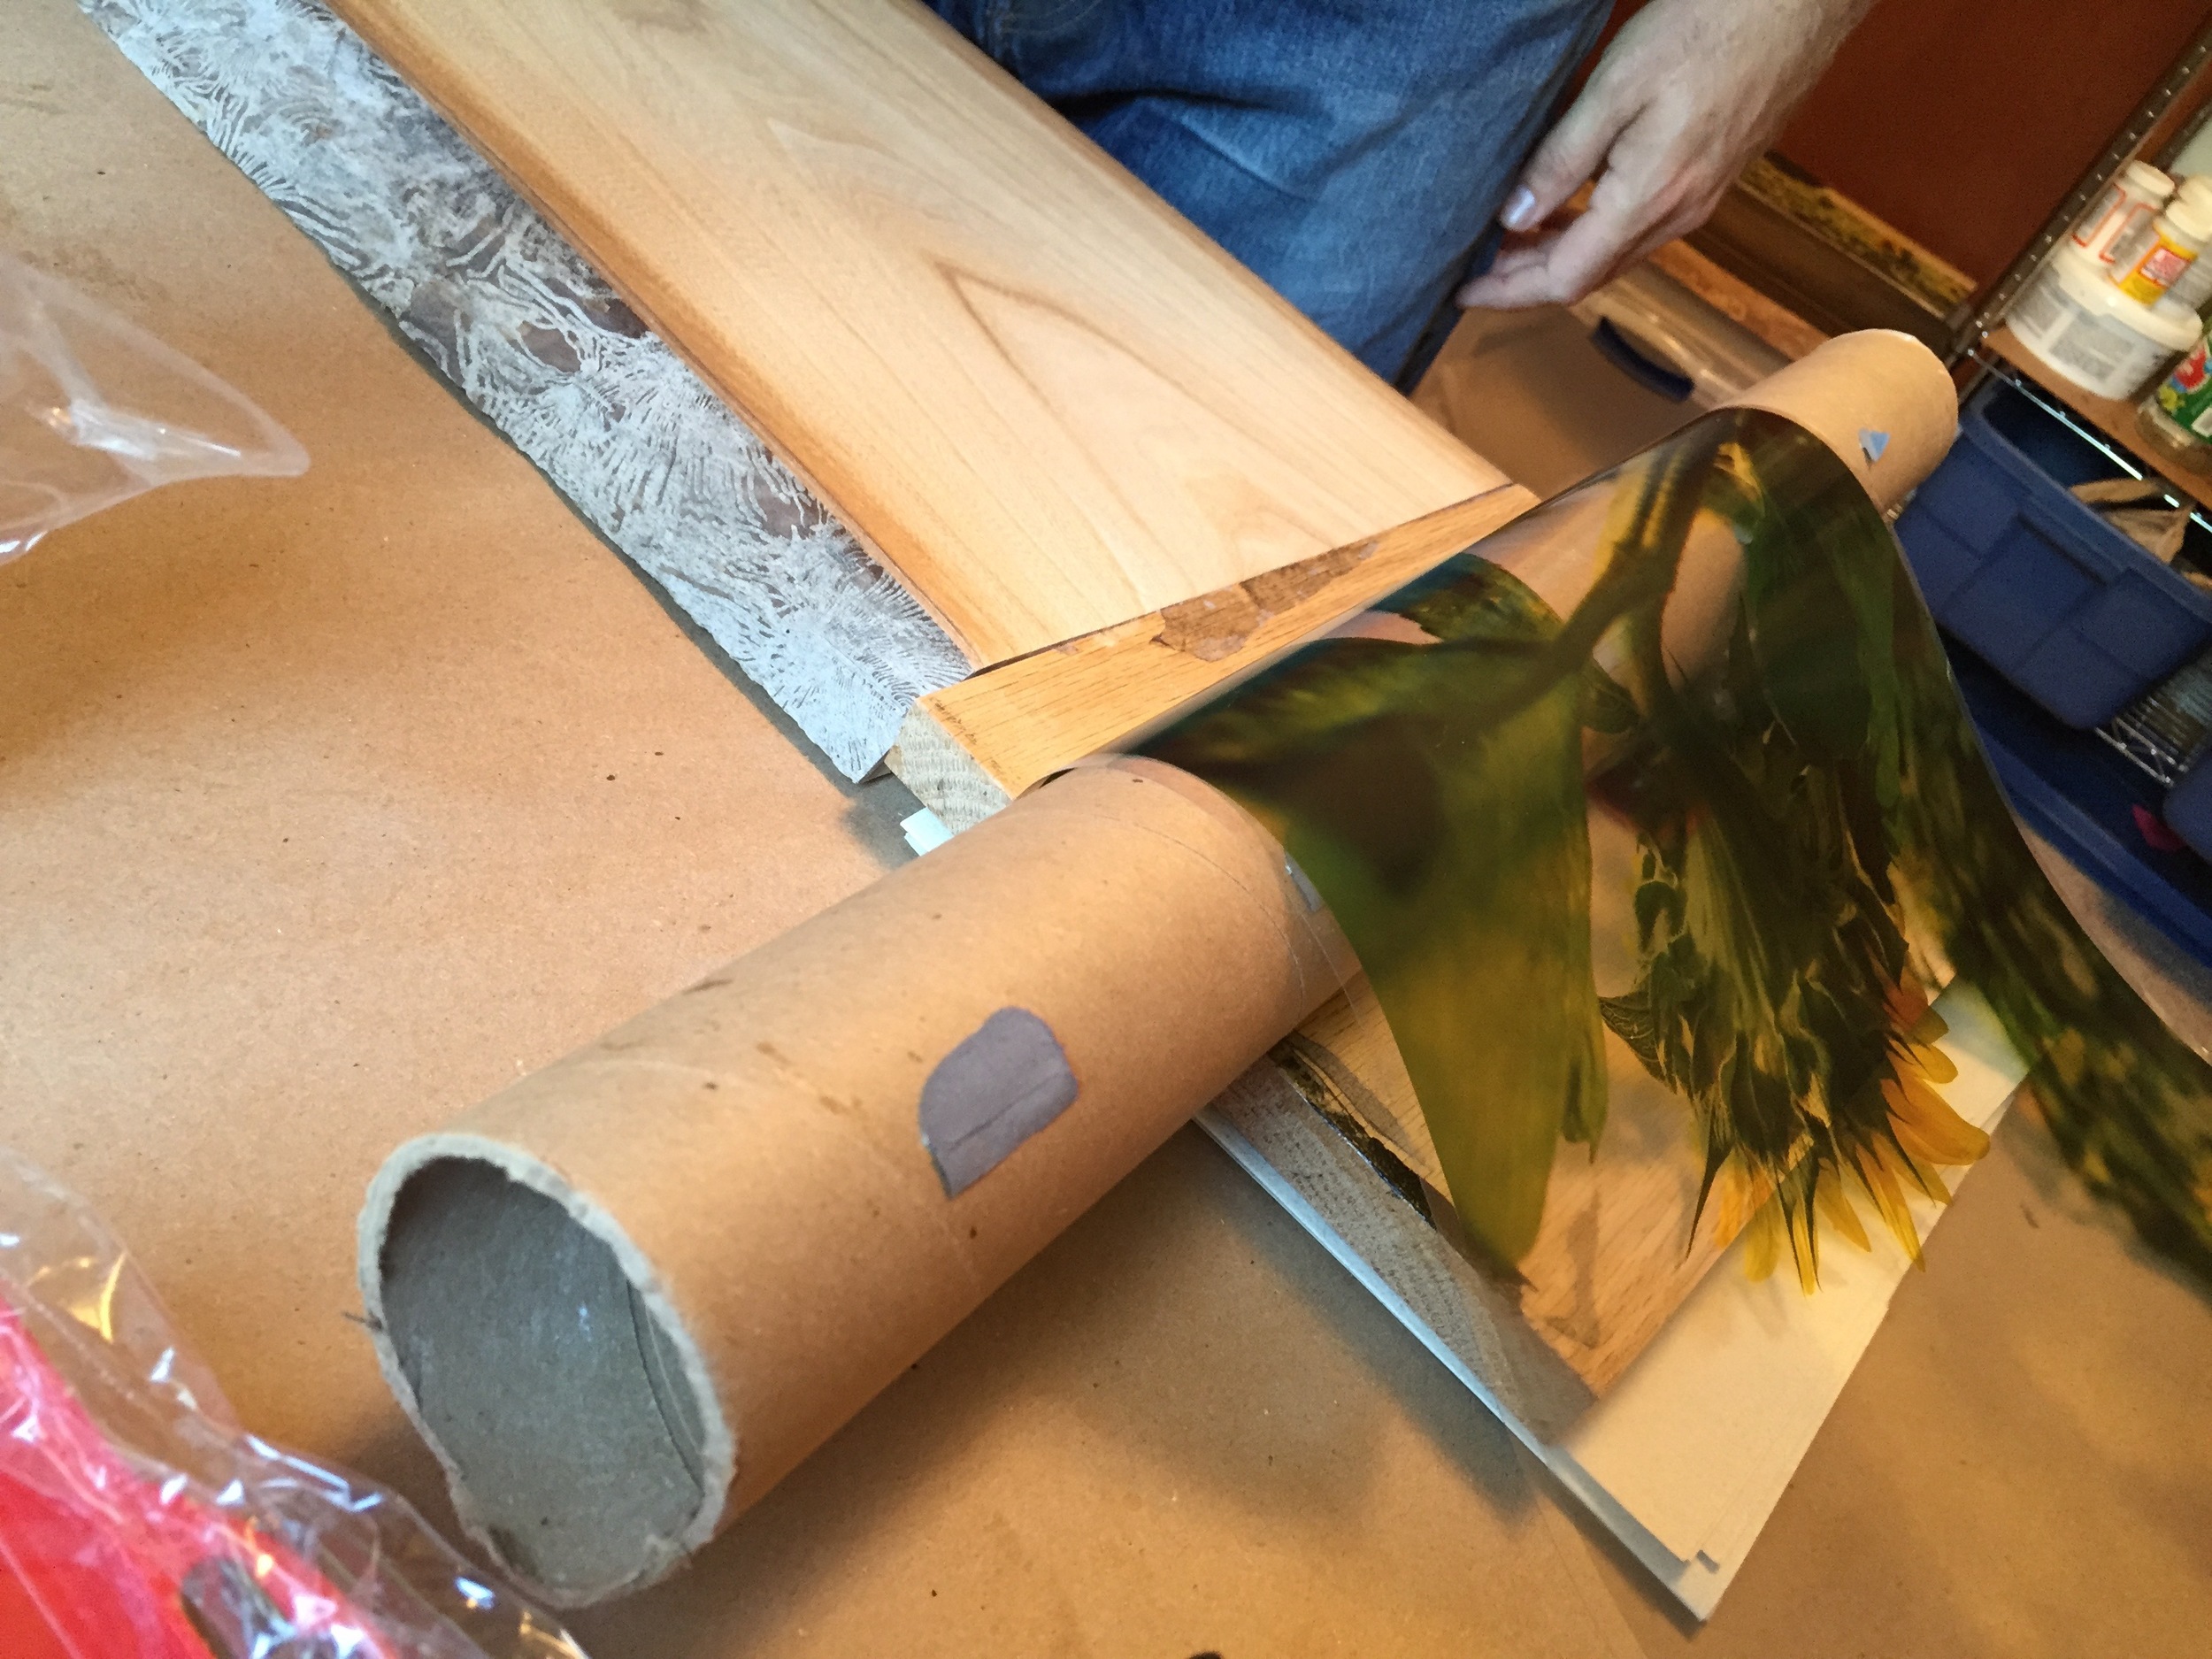
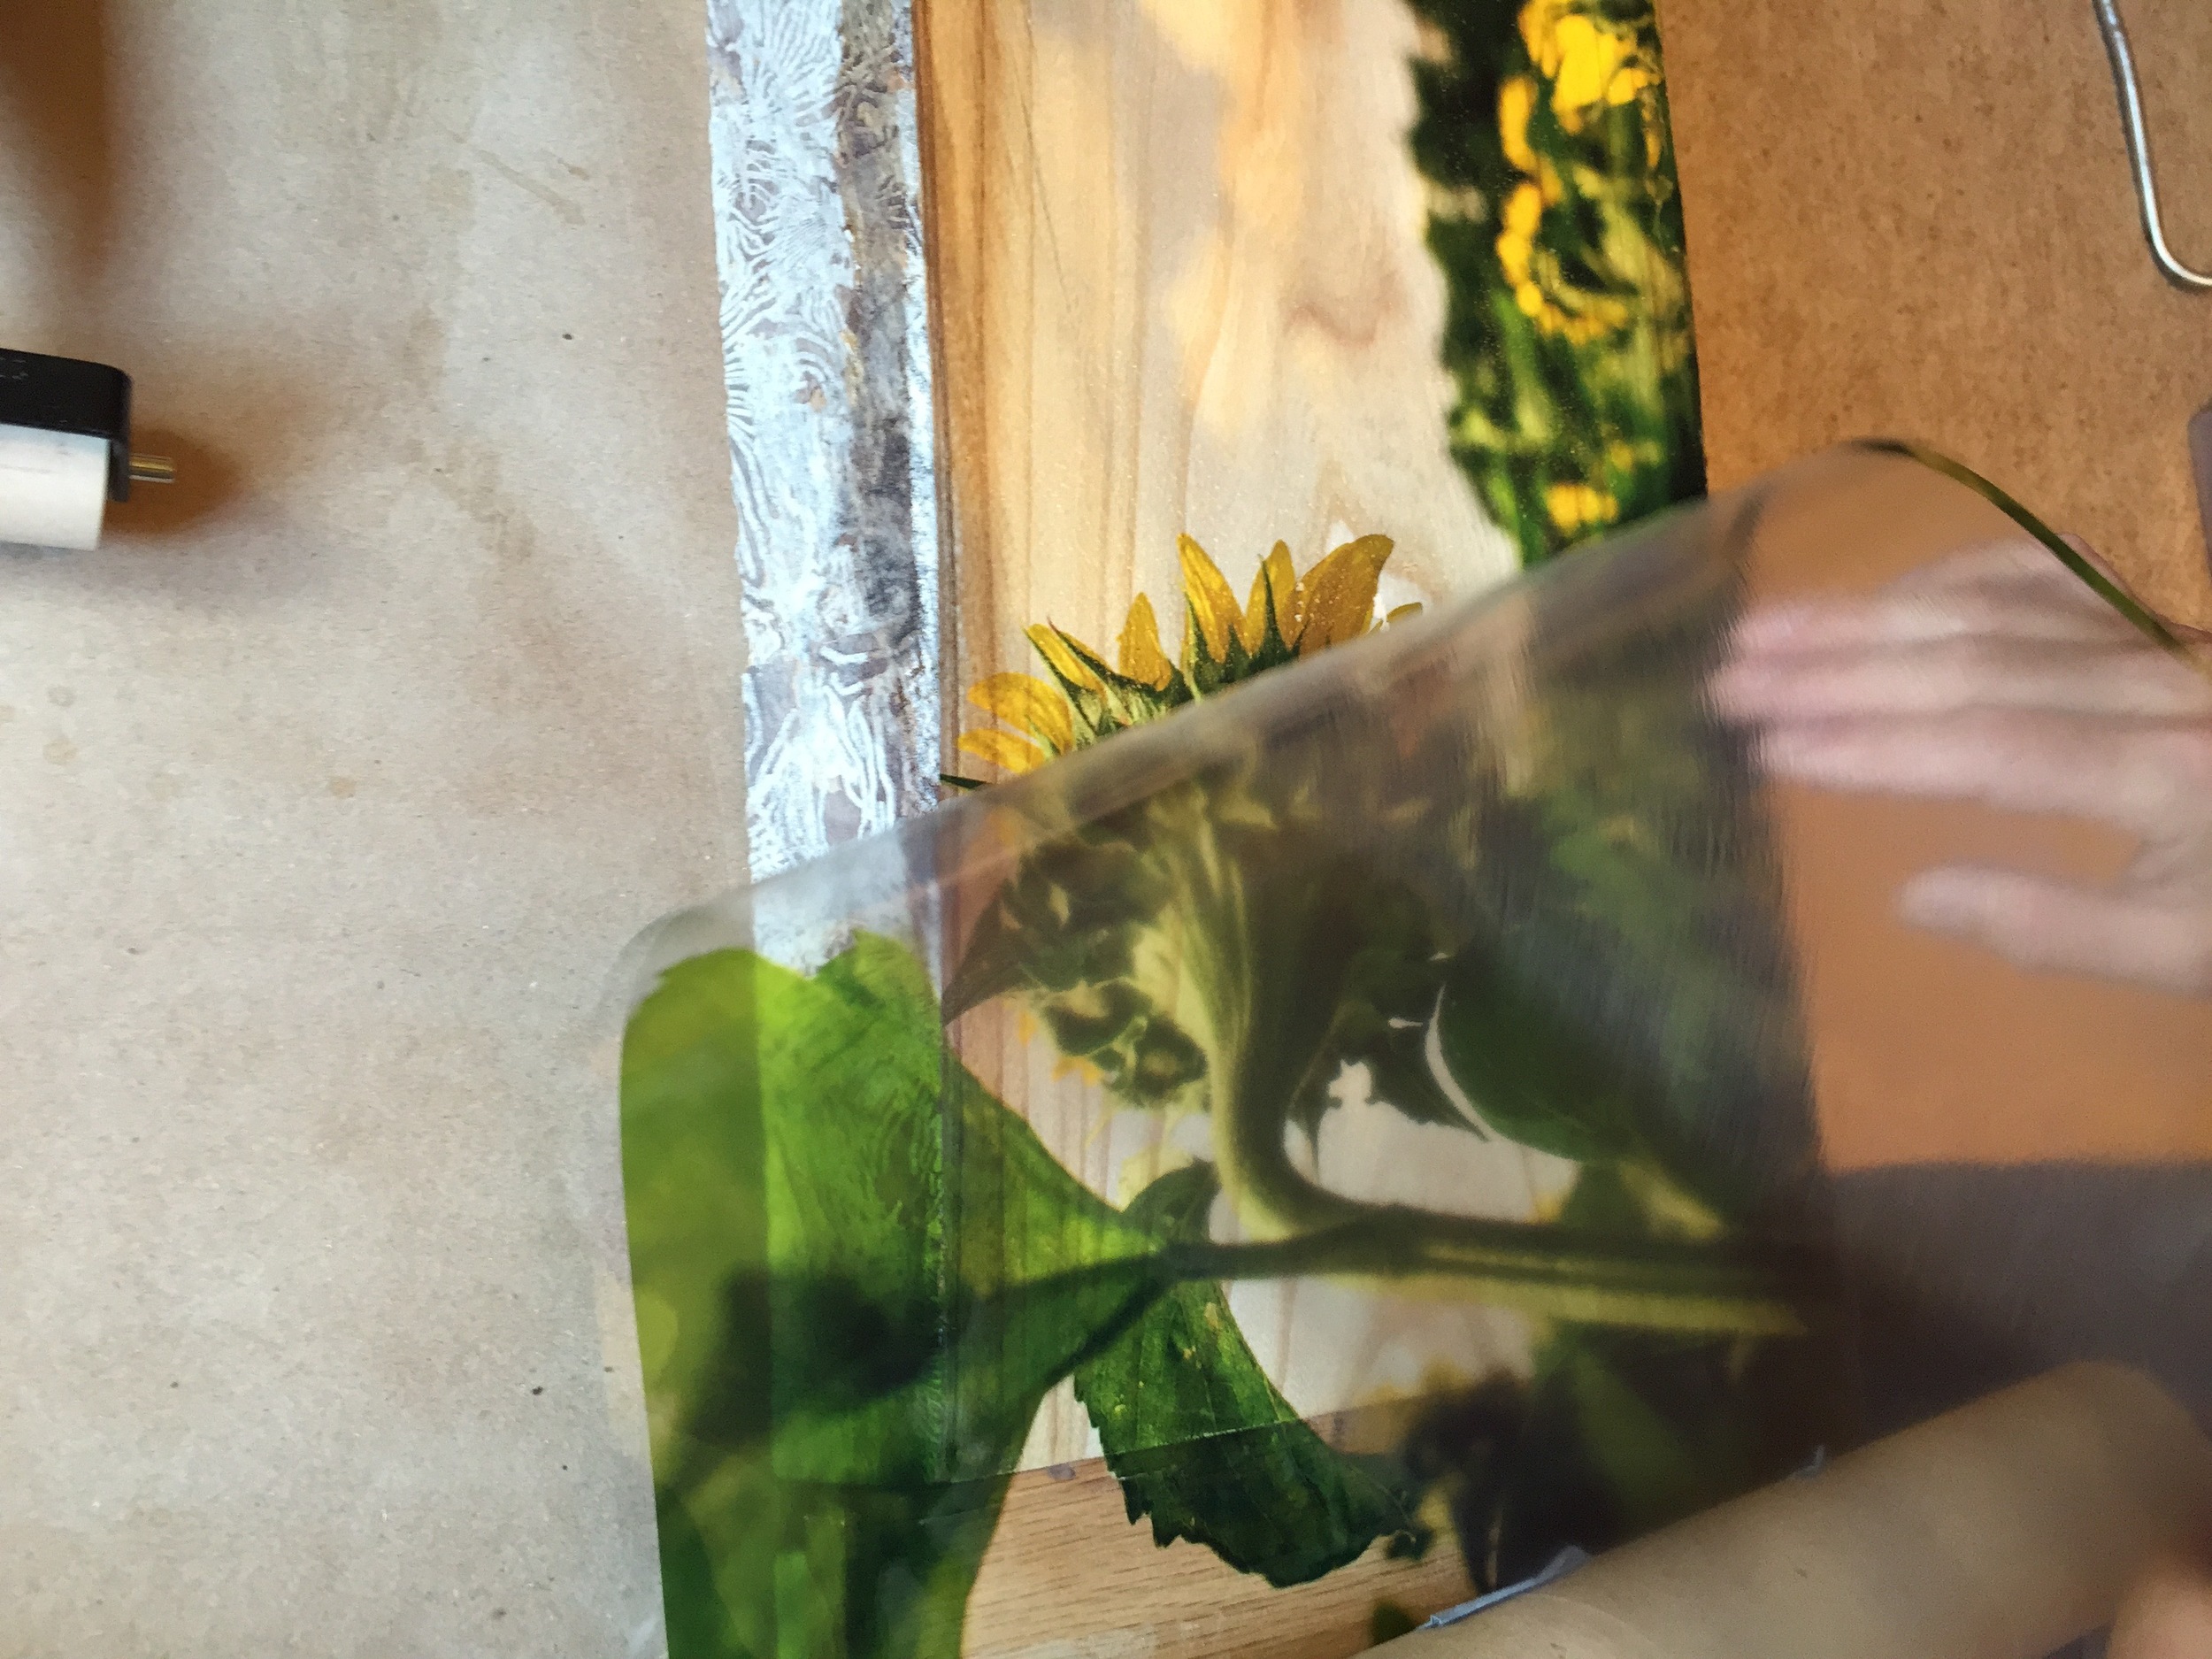
Once you've found the right place, tape the left edge onto the flush holding block. Pull the sheet back, using the taped edge as a hinge. We don't want our transfer film to stick to the wood, so we pull it back and dangle it off the left edge. If you have an old tube, I find it helps to put this under the sheet as shown below.

The Magic Step.

This step can be a little frustrating. It takes practice to be able to get just the right amount of transfer medium onto the wood. It also can take a while to get comfortable pulling back the film and not taking the ink with it. Keep practicing. You will get it! I outline a few tips below that might help you along, but you can always sand the board down and do it again if it's a total failure.

Once you start this step, you can't pause. So read these instructions first and make sure you understand the key steps.

We start by applying a thin and even coat of the DASS Transfer Medium that we prepared in advance.

TIP: Isopropyl Alcohol evaporates, so you don't have a lot of time once you put the brush down and move to lay the clear firm down. Don't rush, but don't doddle.

Smoothly lower the transfer film onto the wood surface, trying to avoid bubbles.

Hit START on the timer and begin running the brayer lightly over the film, ensuring it is in full contact with the wood and solution. We continue to lightly bray or rub CAREFULLY with our hand for 4 minutes. Don't push too hard or you will see the emulsion push off of the wood surface.


The Pull Back

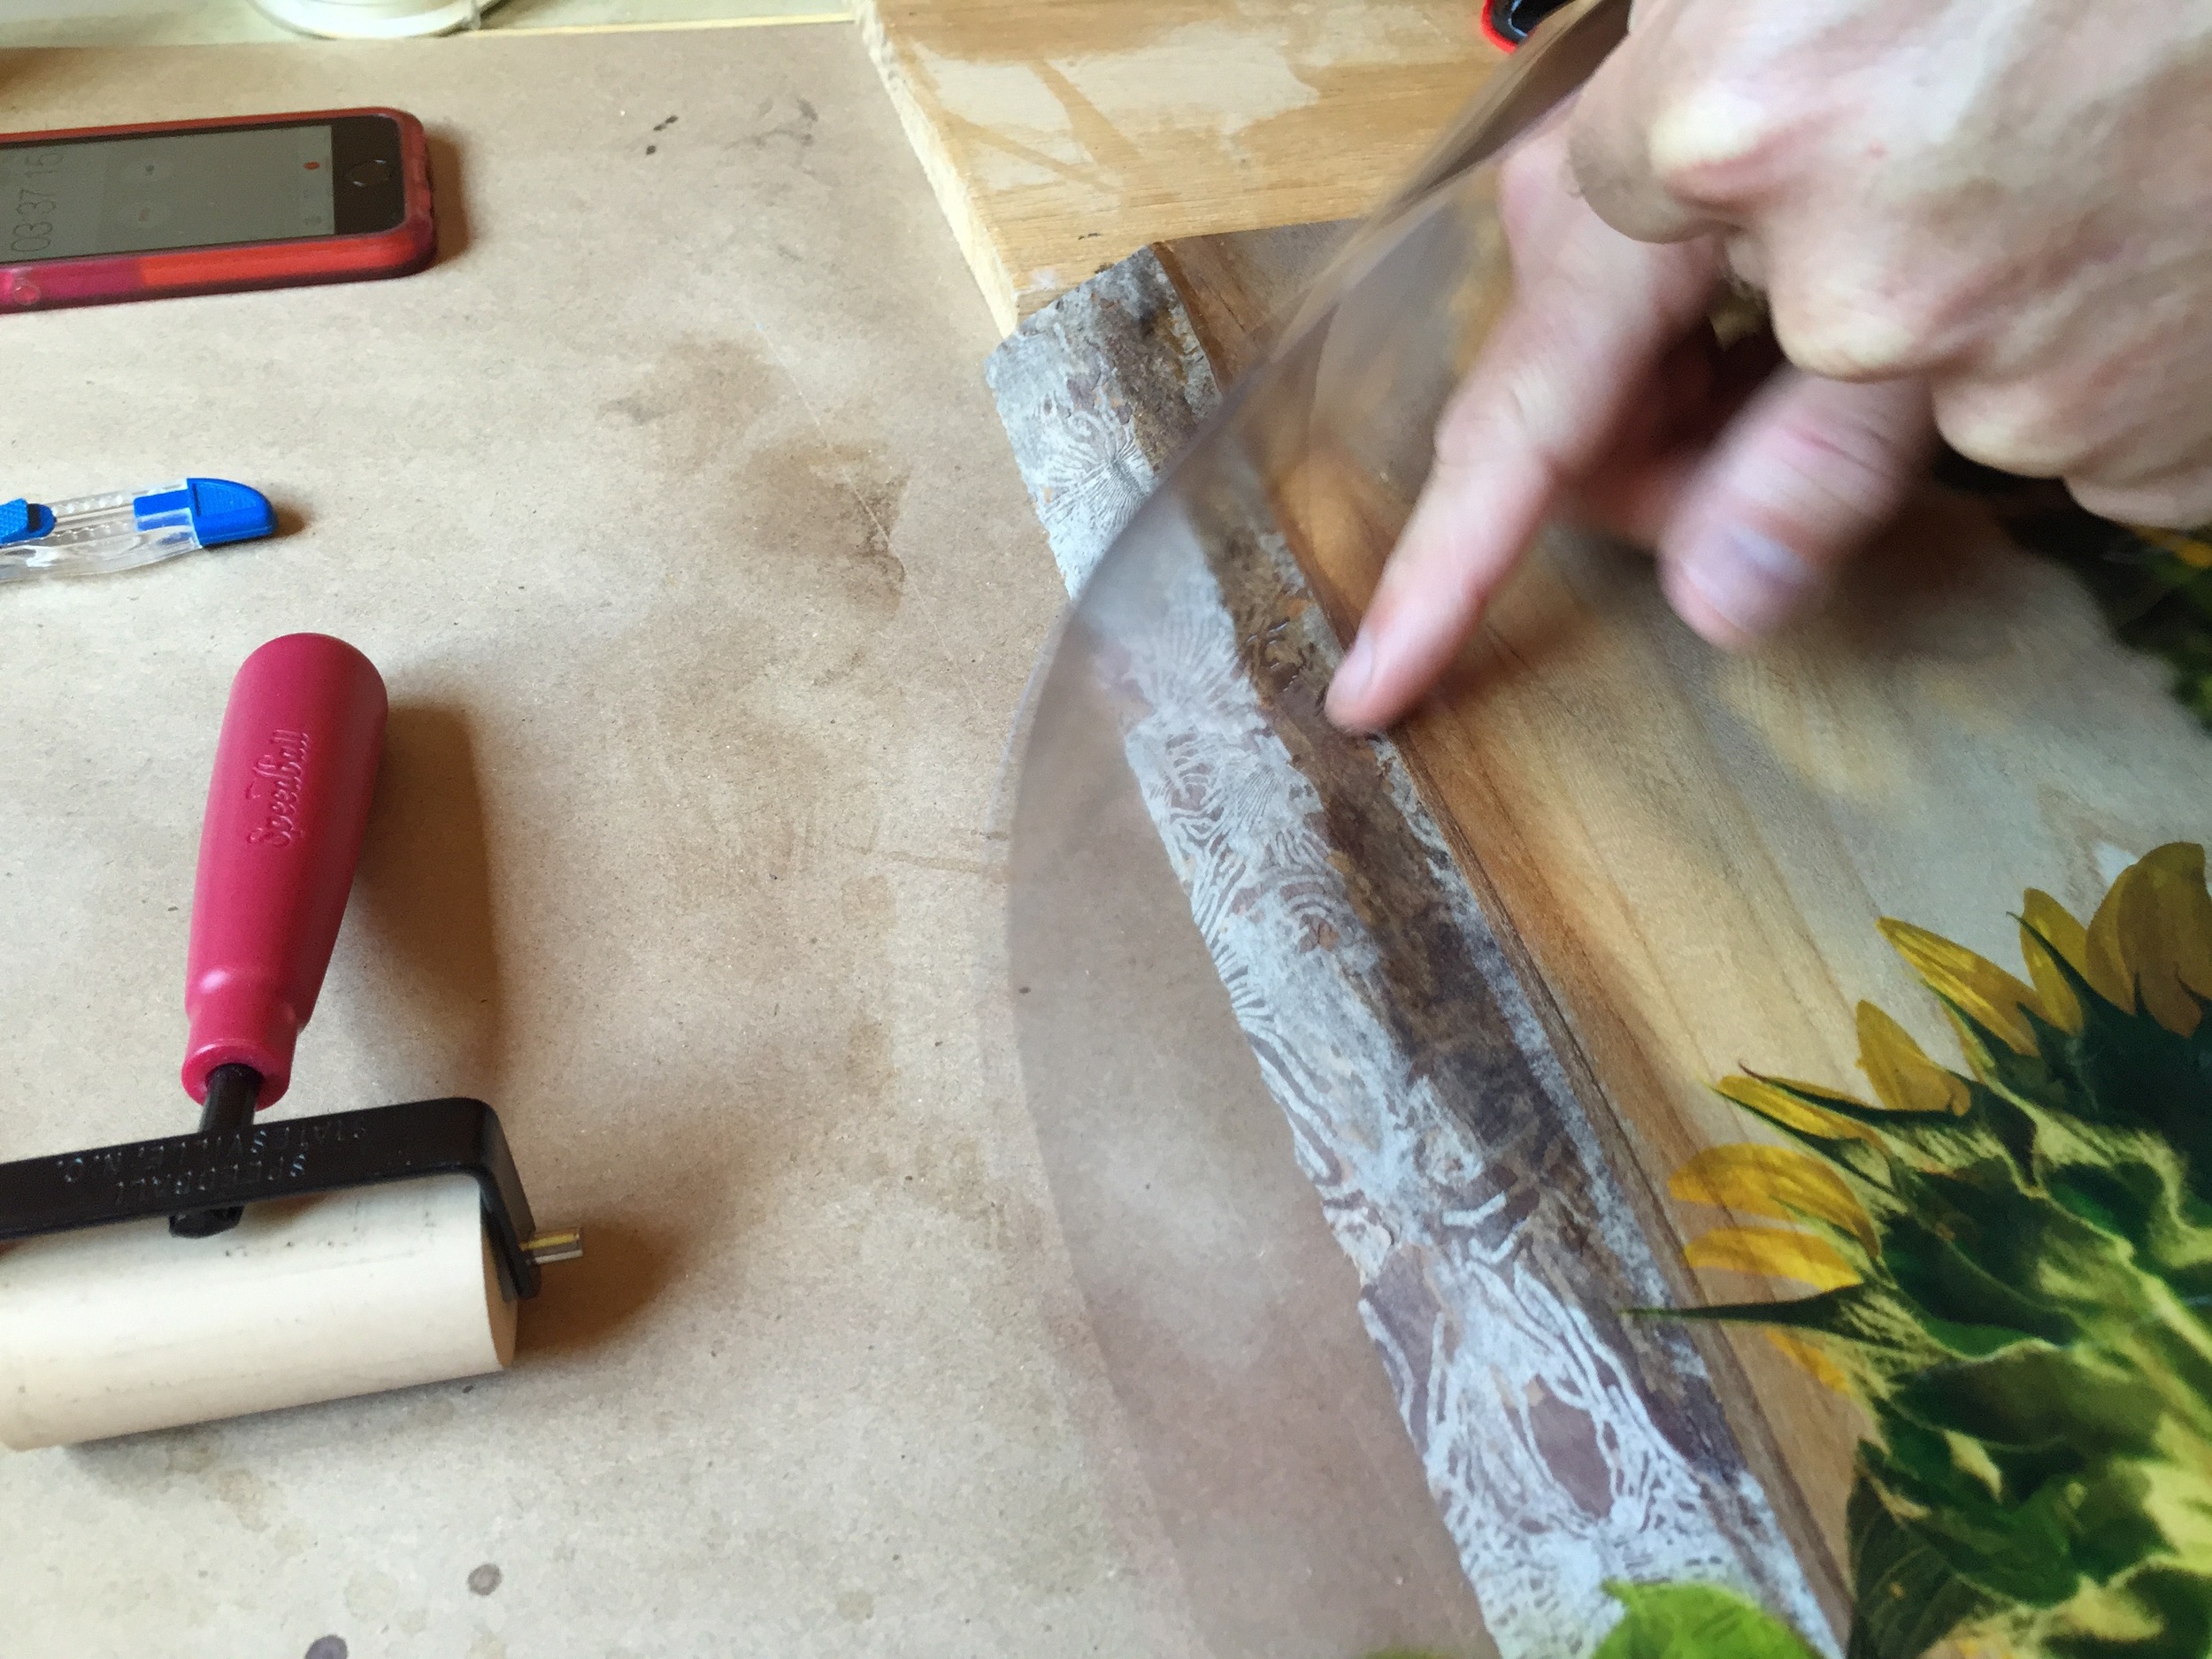
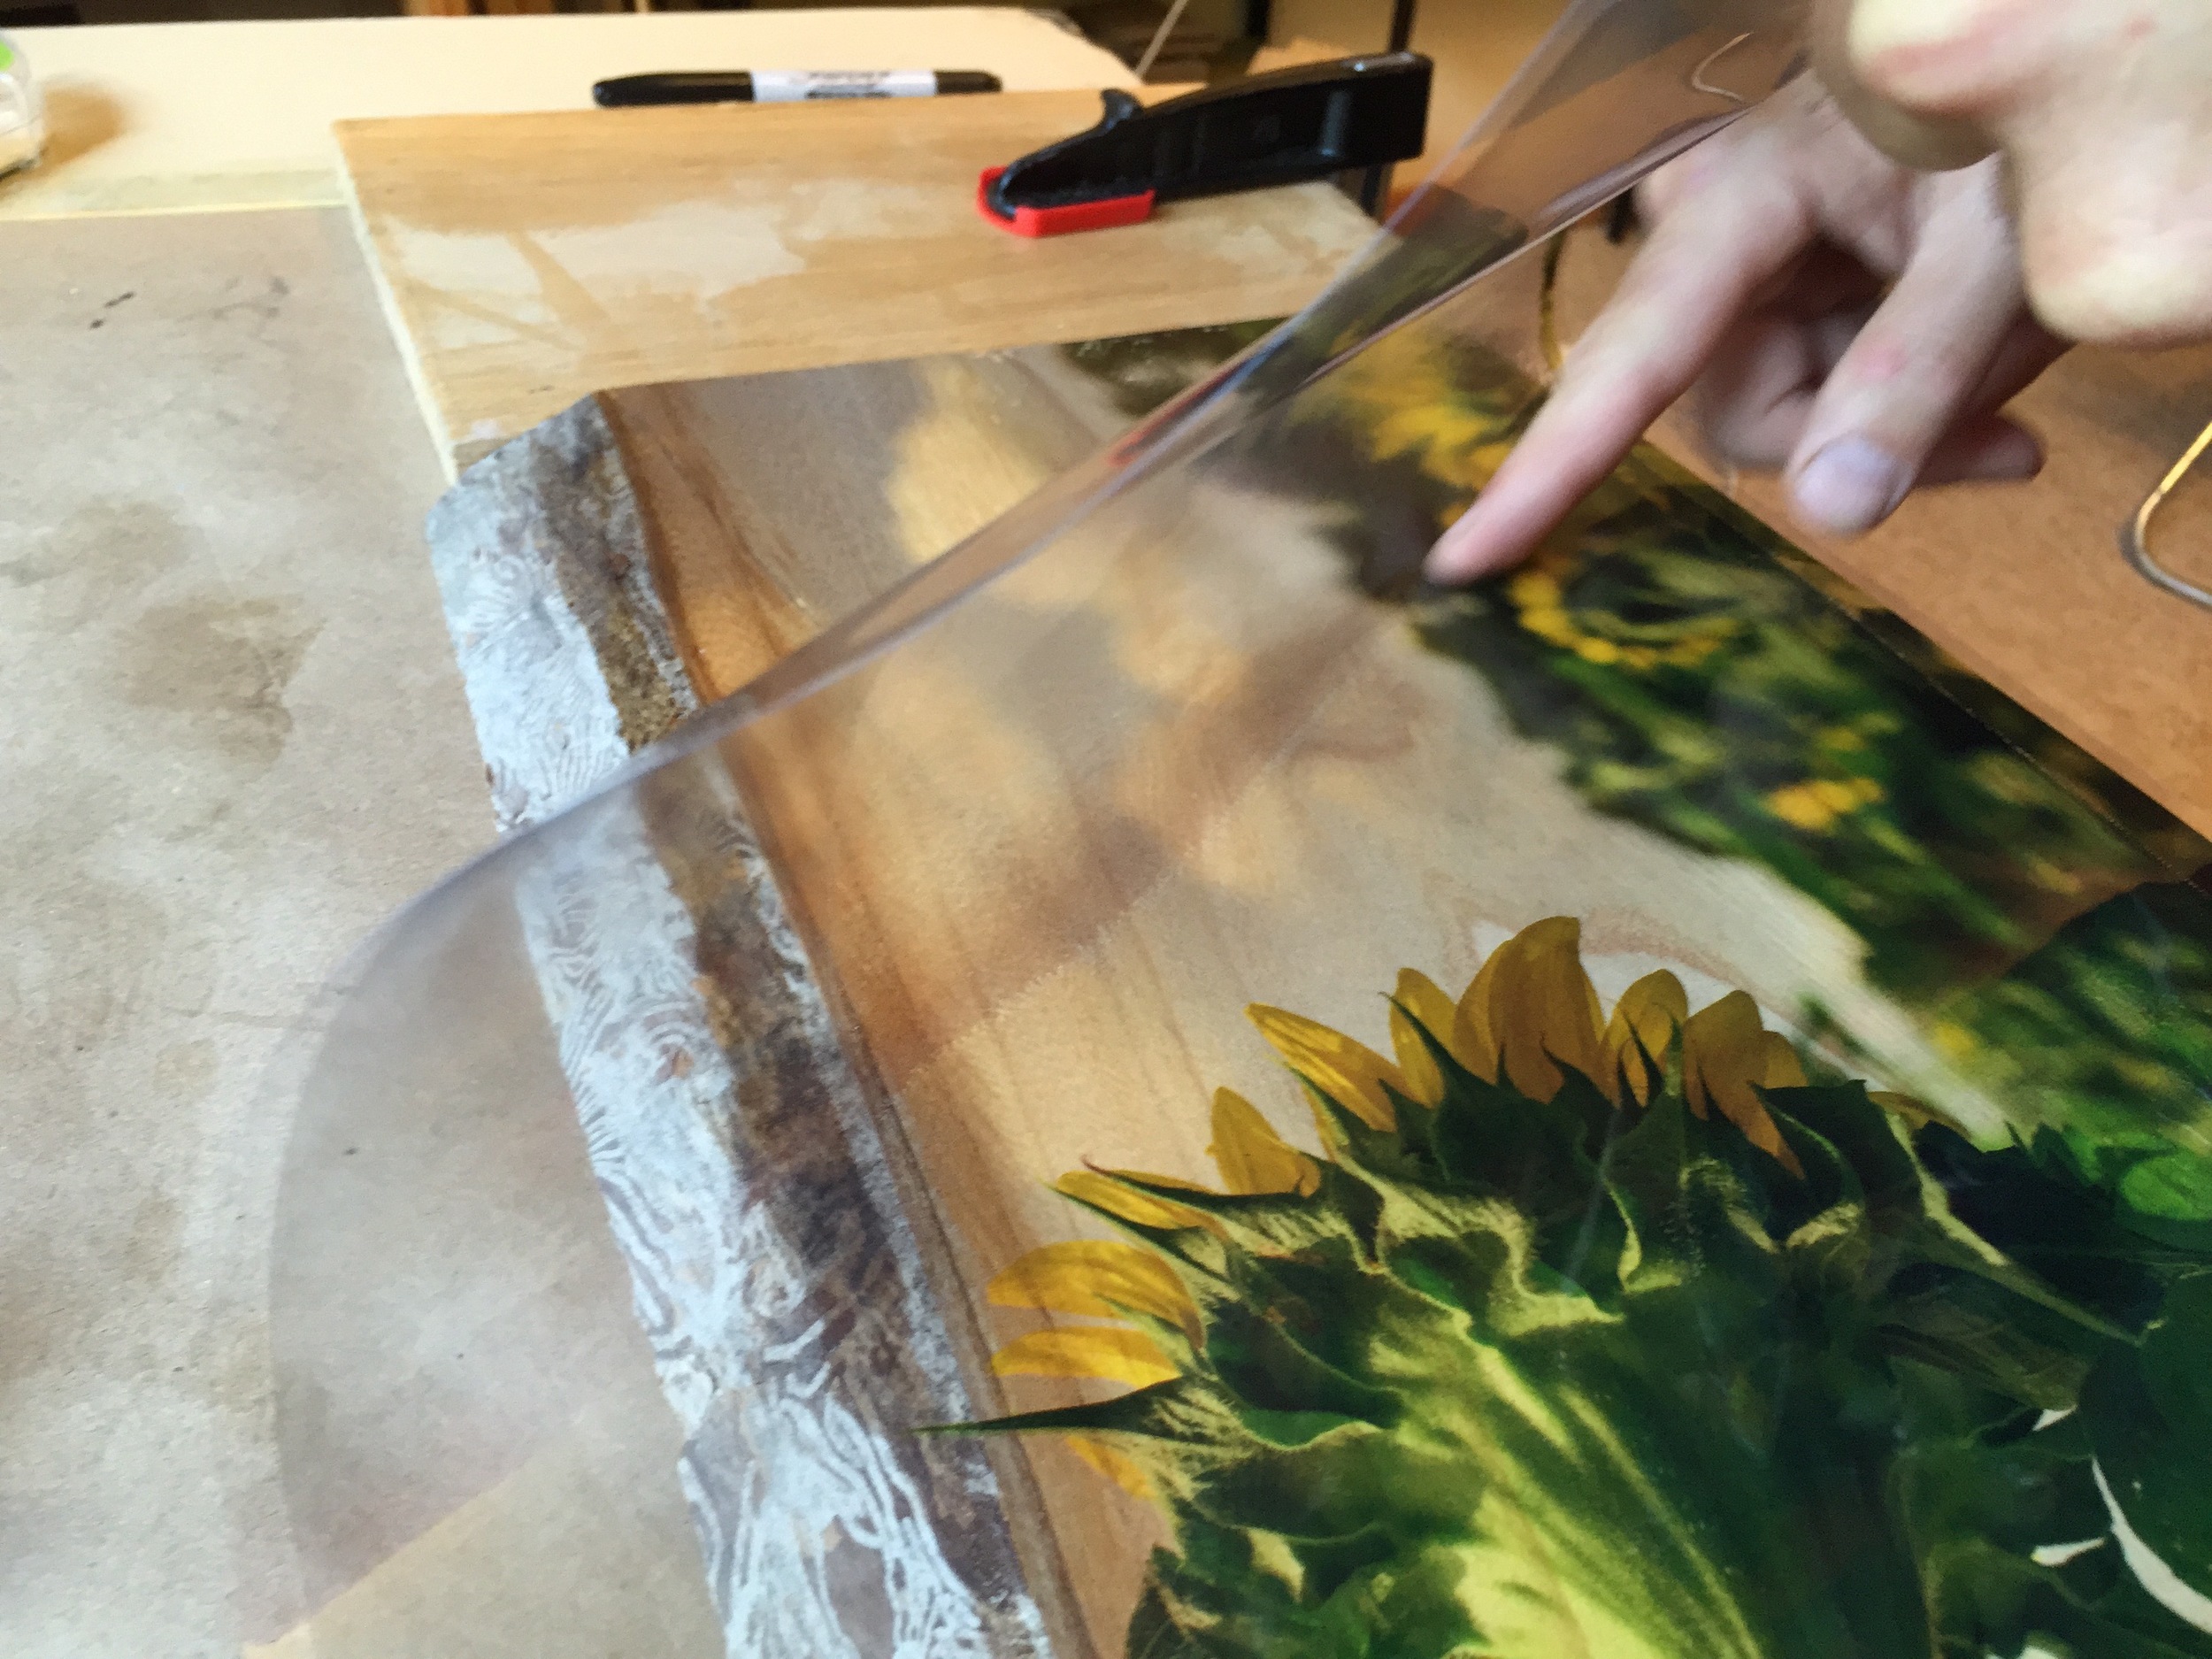
At the four minute mark, start at a corner and begin to slowly pull back the film. Watch the emulsion as you do so. If it starts to come up with the film, roll the film back down and rub lightly at the back of the film with your hand and try lifting again.

I run one hand in a soft rubbing gesture back and forth across the film while the other lifts.

There's only so much you can do in this stage. If you nailed the transfer medium and other stages, then you have a good shot of a great transfer. If things aren't going so well, just do the best you can and keep practicing!

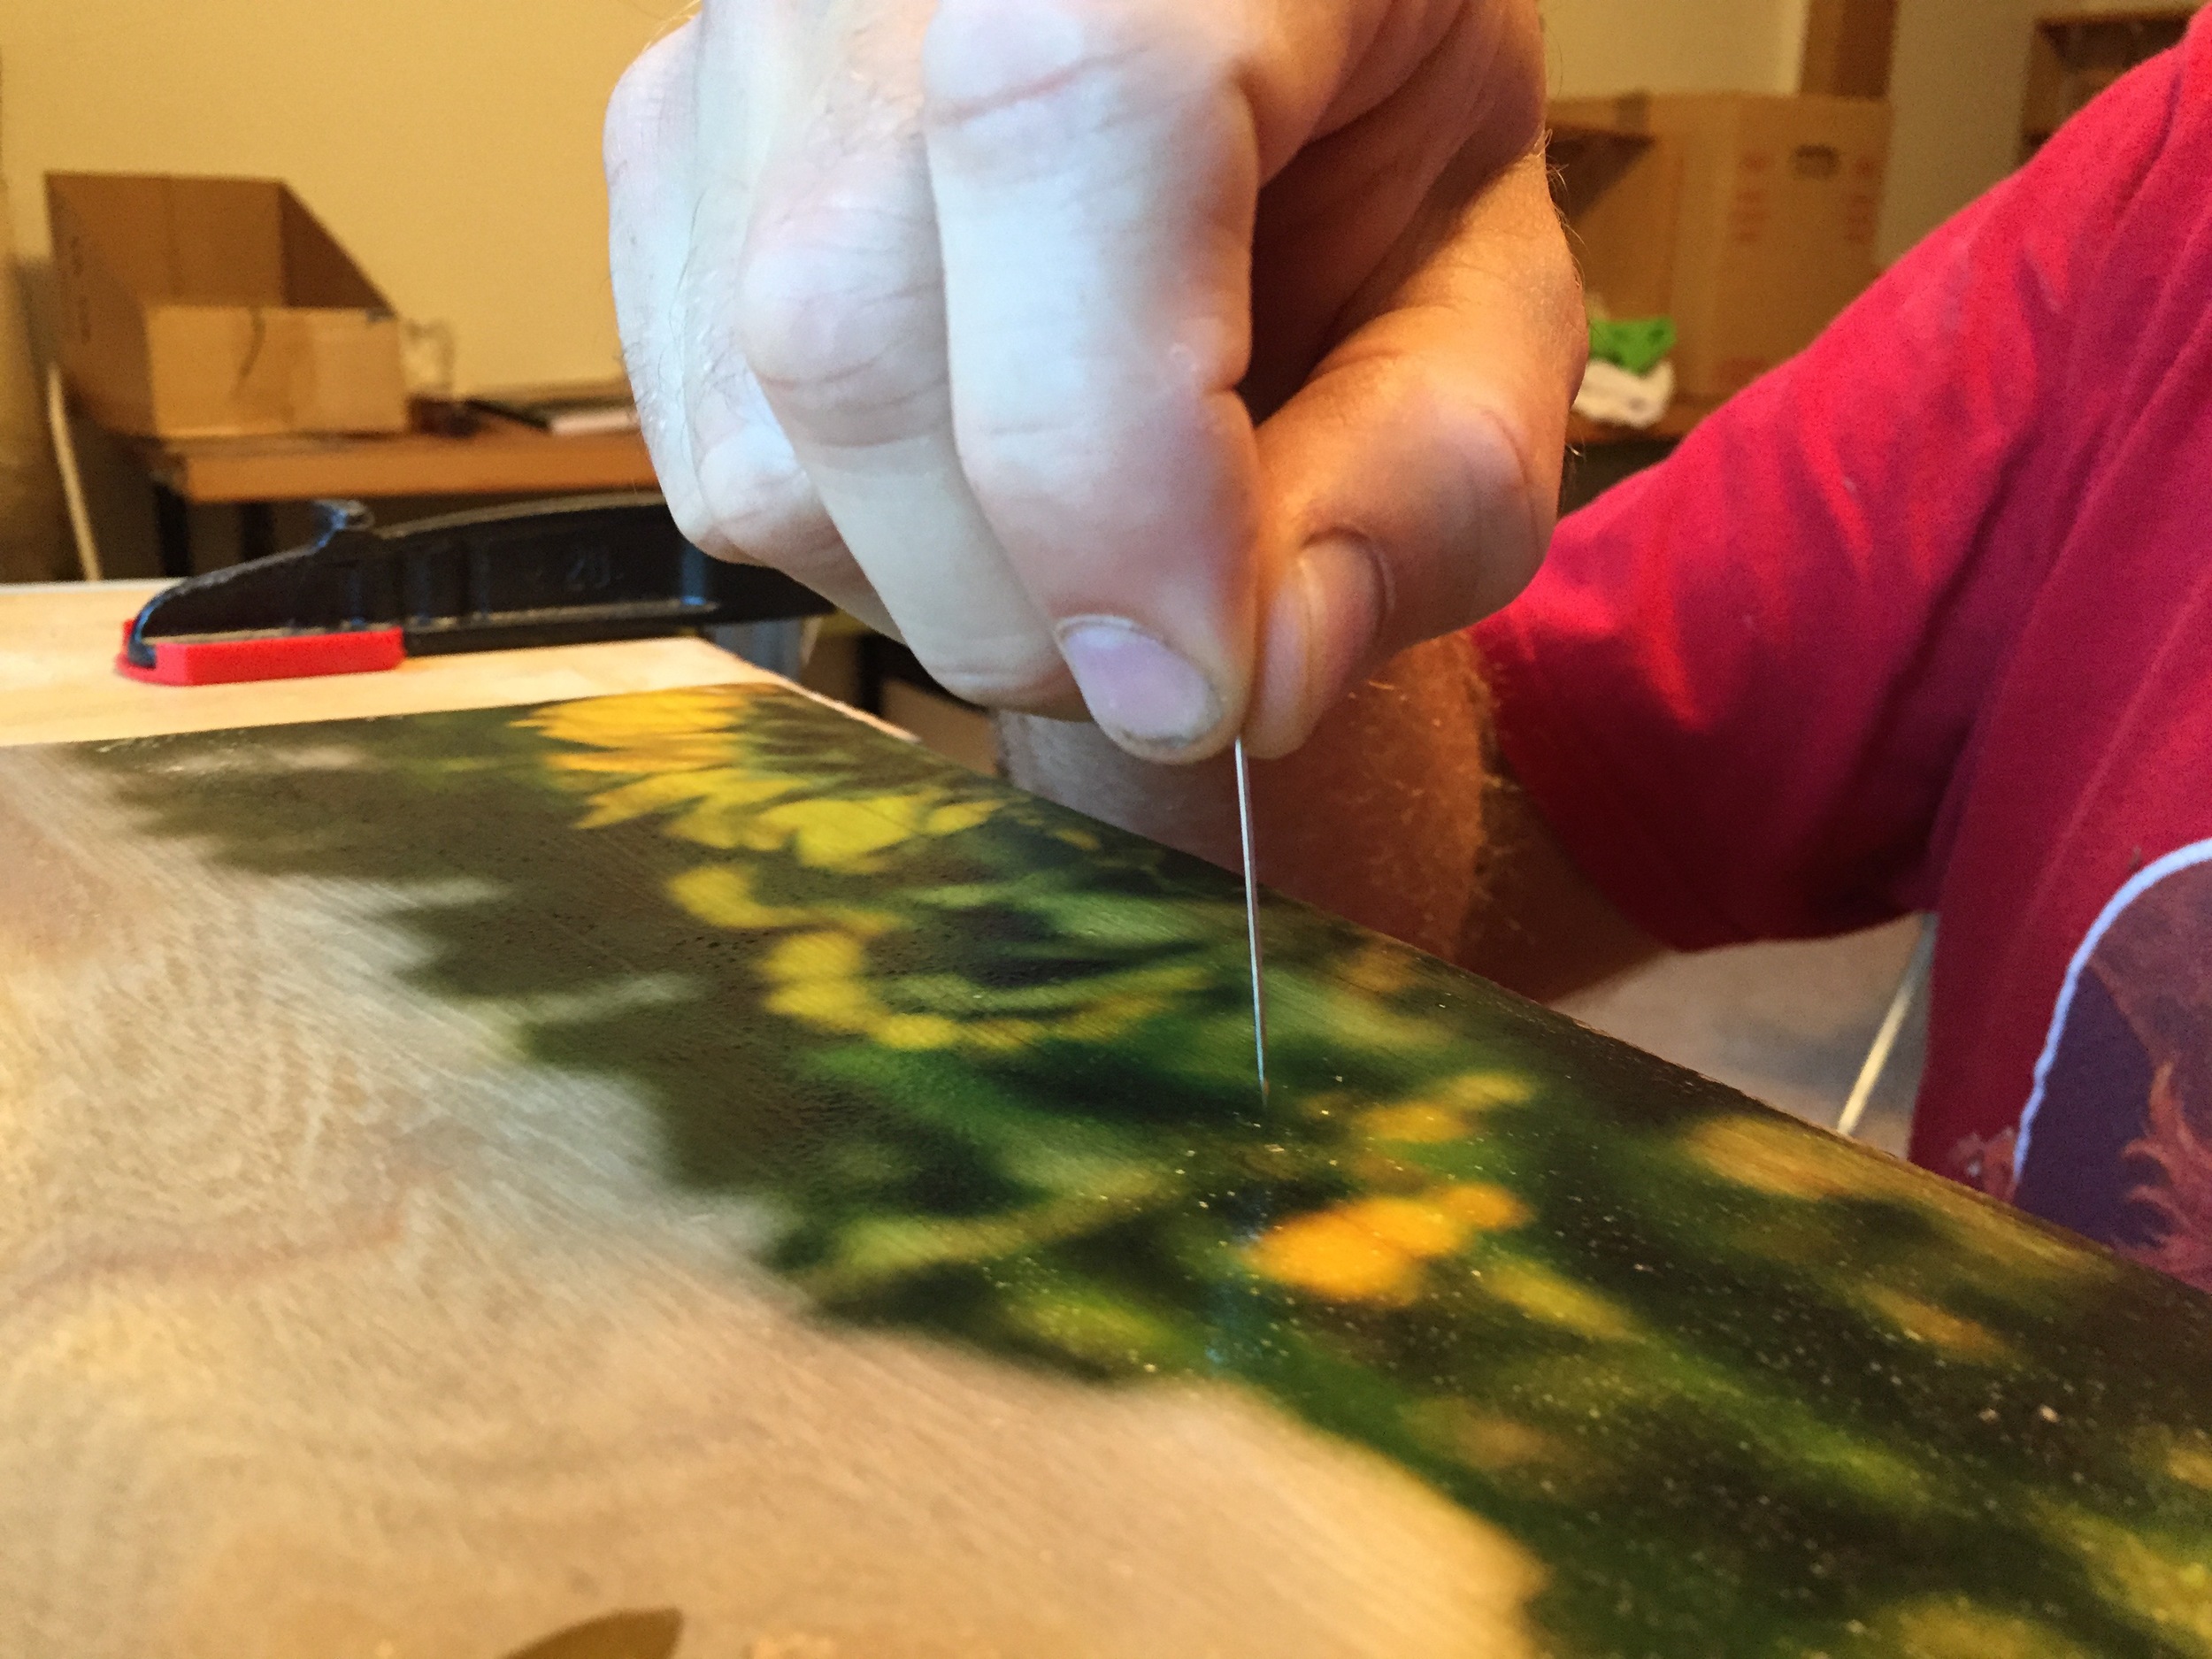
Use a simple sewing needly to pop any large bubbles. Be sure to clean the needle before moving to a different coloured area or you may bring pigment along with you on the needle head.

Tips and Tricks

I give the edges of the wood a couple passes, where an I am pushing down at a 45 degree angle off the piece of the wood, ensuring there is a clean break in the emulsion as the edges can tend to stick otherwise.

If you have one area that doesn't transfer, you may be able to save it. As long as you keep the tape in place. You can apply some DASS transfer medium sauce to the wood where it didn't fully transfer. Then carefully lay the film back down. Don't bray or rub anywhere EXCEPT the area that didn't transfer. Do this for 40 to 60 seconds and carefully lift back up and you should see additional image down on the wood.

Air bubbles or DASS sauce going down too thickly can cause beetle-like patterns in your transfer. Focus on applying the transfer medium a little more evenly and not as copiously. Or brush it for longer until it gets slightly tacky.

India Ink. I've been able to save many a piece by using black india ink and a small brush to fill in any dark areas that didn't transfer.

Stage Three: Finish

Me and Resin have had to go to some pretty strange places....

Me and Resin have had to go to some pretty strange places....

I tend to prefer an epoxy resin finish to the pieces. Anyone who has been following my blog or twitter account has likely seen that I have a very complicated relationship with Epoxy Resin. It's a process unto itself, so I'm not going to include it here.

What I will say is that you can get a nice finish by spraying the piece with an Archival UV protectant (available at any art store) and then rolling on a light coat of varnish or acrylic gloss.

I look forward to your comments and let me know if anything isn't clear so I can make some additions and updates to the above piece. 

Goals and Conversions - They matter, even for artists!

A few people have asked me if they should be running paid advertising - pay per click type through Facebook, Google, Twitter, etc.

The answer is "probably" but with a giant caveat; make sure you aren't throwing your money away.

The best way to make sure you aren't pouring money into the toilet is to track conversions. You set a goal that you want people to achieve on your website. It could be to buy something, visit a page or join your newsletter. Then you track how many of the people who click on your ads accomplish your desired goal. This is a conversion.

I created these two videos to explain goals and conversions and then to give a high level introduction to the reports and how to set up a goal. I am using Google Analytics and Squarespace.

In this first of two videos, I cover the principles and concepts around why we should set up goals and track conversions as artists and creators. In the next video, I will show how to create a goal in Google Analytics and a trick for tracking newsletter signups in Squarespace

In the first video, I covered the principles and concepts around why we should set up goals and track conversions as artists and creators. In this video, I show how to create a goal in Google Analytics and why goals matter. For the Squarespace users, I share a trick for tracking newsletter signups with Squarespace.


Please let me know if these are helpful. I'm curious as to whether the second video is clear enough or if I should break it down further.